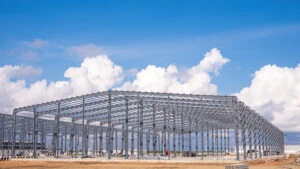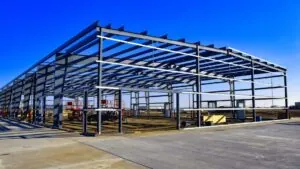
A steel building as workshop gives Canadian tradespeople, hobbyists, and small manufacturers a clear-span interior free of load-bearing posts, engineered to handle local snow and wind loads, and built to last decades with minimal upkeep. Pre-engineered steel workshop buildings are available in spans from roughly 20 feet to well over 100 feet, making them practical for a single-bay home garage right up to a multi-bay commercial fabrication facility. The key is specifying the right frame, cladding, insulation, and door package before fabrication begins, because changes after the steel is cut add real cost and delay.
Key Takeaways
- Clear-span frames eliminate interior columns, giving you full flexibility to position lifts, benches, and equipment anywhere.
- Snow and wind load requirements vary significantly by province and municipality, so a building engineered for Kelowna is not the same structure as one engineered for Timmins.
- The foundation is a separate concrete scope from the steel kit and is often the biggest budget surprise for first-time buyers.
- Door width and height, eave height, and insulation type must be decided at the design stage, not after delivery.
- Permit and engineering requirements differ by municipality; stamped drawings are standard practice and required in most jurisdictions.
Definitions and Scope
A pre-engineered steel building as workshop space is a factory-fabricated structural system consisting of rigid-frame bents, purlins, girts, and steel cladding panels, all designed to a specific span, eave height, and load combination before a single piece leaves the plant. The term “pre-engineered” means the structural calculations are completed by a licensed engineer during the design phase, and stamped drawings are produced for permit submission. This is distinct from a conventional structural steel building, where fabrication drawings are produced after a separate engineering contract.
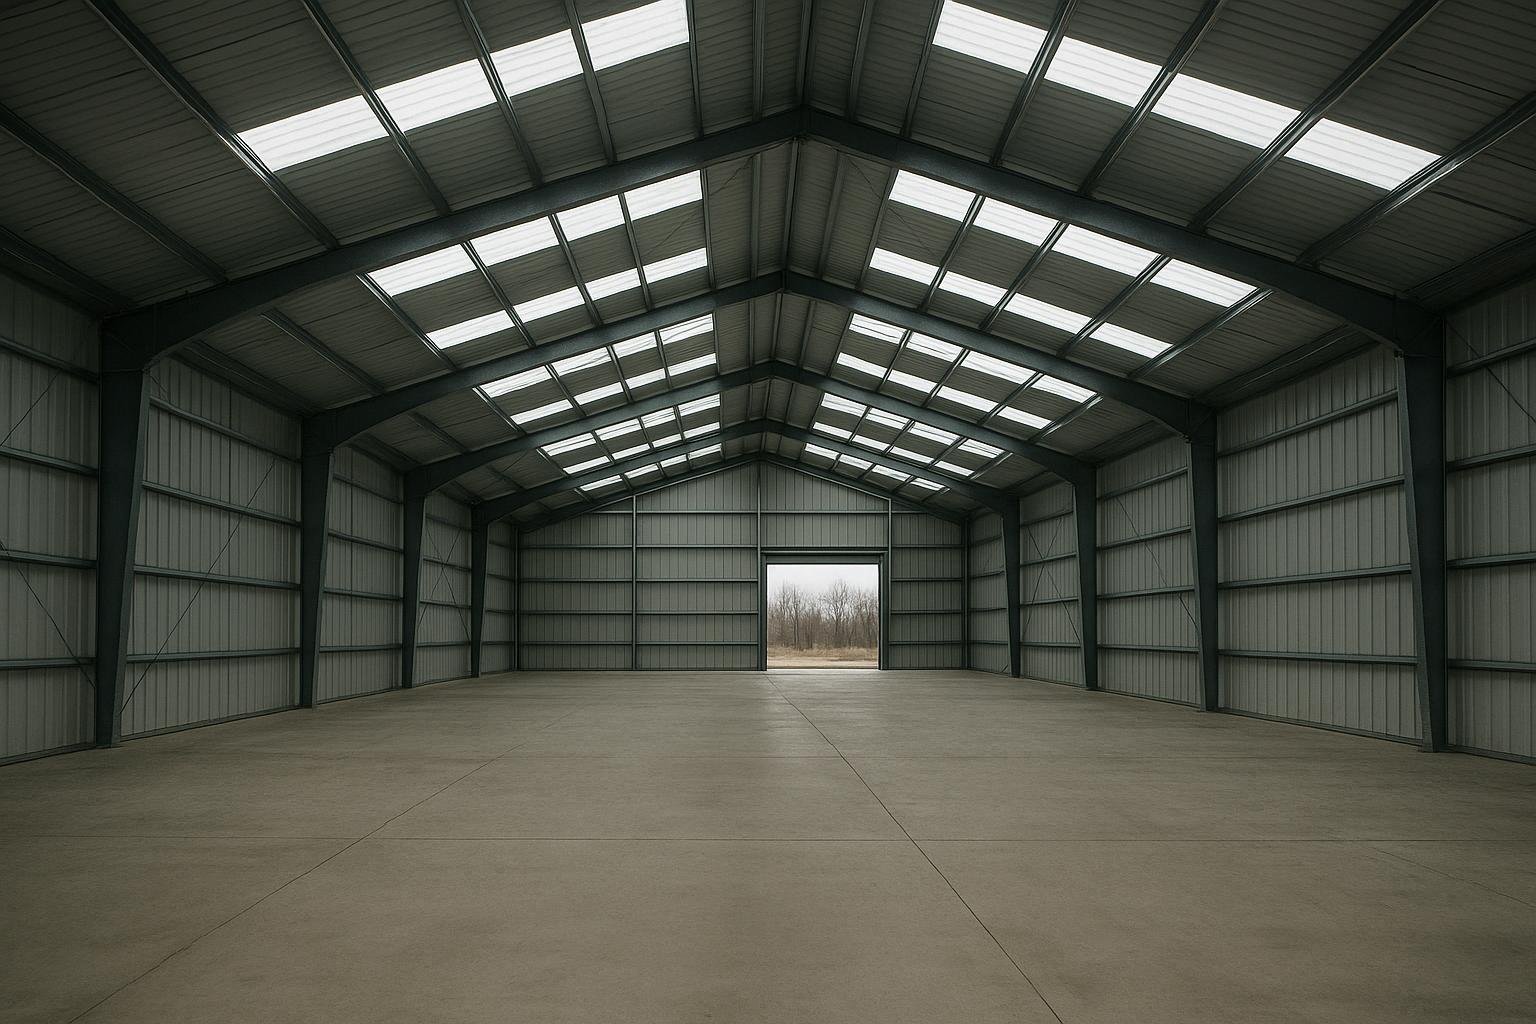
For workshop use, the most important structural concept is the clear span. A clear-span rigid frame carries all loads through the frame legs to the foundation without any interior columns. This matters because a column in the middle of a bay blocks a vehicle hoist, a welding table run, or a CNC machine footprint. Multi-span frames use interior columns to achieve wider overall widths at lower steel weight, but they divide the floor plan in ways that limit equipment placement.
Purlins are the horizontal secondary members that span between the main frames and support the roof cladding. Girts perform the same role on the walls. Both are typically cold-formed Z or C sections. Understanding these components helps when comparing quotes, because purlin spacing and gauge affect both structural performance and insulation attachment options.
Why This Matters for Canadian Workshop Owners
Canada’s climate range is extreme. A workshop in Lethbridge, Alberta faces sustained wind events and moderate snow; one in Sault Ste. Marie, Ontario carries some of the highest ground snow loads in the country. The National Building Code of Canada sets the framework, but each province and municipality applies its own snow load table and sometimes additional wind or seismic requirements. A building that is not engineered to the correct local loads is not code-compliant and will not receive a permit.
This is why a per-square-foot price quoted without knowing the location, span, eave height, and door openings is essentially meaningless. Two 40×60 workshops in different provinces can carry materially different steel weights in the frame because the load inputs differ. Titan’s process starts with a site and requirements review that captures the municipality’s snow load, the prevailing wind direction, and the intended use before any pricing is produced.
Steel commodity pricing also moves with global markets, so quotes are time-bound. Locking in a quote and moving to contract quickly protects against price movement during the fabrication window. For workshop buyers who are also comparing pre-engineered options against conventional builds, the pre-engineered steel buildings overview explains the structural differences in detail.
Clear-span interiors matter most for equipment and livestock movement. For workshops, that means no column interrupting a vehicle bay, a welding run, or a spray booth footprint.
Your Options: Workshop Building Configurations
Single-Slope (Mono-Slope) Clear-Span
A single-slope frame pitches the roof in one direction, typically from a higher eave at the front to a lower eave at the rear. This configuration suits workshops built against a property line or an existing structure, because the low eave can be positioned close to a fence or wall. Drainage is simple and predictable. The limitation is that the asymmetric frame uses slightly more steel than a symmetrical gable for the same span, which can affect cost at wider spans.
Symmetrical Gable Clear-Span
The symmetrical gable is the most common workshop configuration in Canada. Both eaves sit at the same height, the ridge runs down the centre, and the frame is efficient in steel weight. Spans from 30 feet to 80 feet are routine; wider clear spans are achievable but require heavier frame sections. This is the right choice when the workshop will be freestanding on a lot with no adjacency constraints.
Multi-Span (Modular) Frame
A multi-span building uses interior columns to achieve a wider overall footprint at lower steel cost per square foot. For a commercial workshop or fabrication shop that needs 120 feet or more of width, multi-span is often the practical choice. The trade-off is that interior columns must be incorporated into the floor plan from day one. Columns can be positioned to align with bay dividers or equipment rows, but they cannot be moved later without re-engineering the frame.
Lean-To Addition
A lean-to is a single-slope structure attached to an existing building, sharing one wall. Workshop owners often add a lean-to to an existing garage or barn to create covered storage for materials, a parts wash area, or a finishing bay. The lean-to frame attaches to the host building’s structural wall, so the host building must be assessed for the additional load before design begins.
Mezzanine-Ready Frame
Some workshop buyers need office space, parts storage, or a loft above the main floor. A mezzanine-ready frame is engineered with the mezzanine loads included in the original design, with columns and beam pockets positioned to accept the mezzanine framing. Adding a mezzanine to a frame that was not designed for it requires a full re-engineering exercise and is expensive. Specifying it at the outset costs very little extra.
Insulated Panel System
Rather than applying batt insulation between the girts and cladding after erection, some workshop buyers choose factory-assembled insulated metal panels (IMPs). These panels combine the exterior cladding, insulation core, and interior liner in a single product. They eliminate the thermal bridging that occurs at girts in a conventional batt system and speed up the enclosure phase. IMPs carry a higher unit cost than batt insulation but reduce on-site labour and produce a tighter building envelope, which matters in a heated workshop in a cold climate.
Steel Building as Workshop: Options Compared
The table below compares the main configurations for a steel building as workshop use across the factors that matter most to Canadian buyers.
| Configuration | Best For | Typical Clear Span | Relative Steel Cost | Key Limitation |
|---|---|---|---|---|
| Symmetrical gable clear-span | Freestanding shops, most common use cases | 30 ft to 80 ft | Moderate, efficient frame | Wider spans increase frame weight quickly |
| Single-slope (mono-slope) | Property-line builds, additions | 20 ft to 60 ft | Slightly higher per sq ft vs. gable | Asymmetric drainage; lower rear eave limits rear access |
| Multi-span frame | Large commercial shops, 100 ft+ width | Unlimited with columns | Lower per sq ft at large scale | Interior columns constrain equipment layout |
| Lean-to addition | Expanding an existing structure | 15 ft to 40 ft | Low (shares one wall) | Host building must be assessed for load |
| Mezzanine-ready frame | Shops needing office or parts storage above | Same as base frame | Modest premium at design stage | Must be specified before fabrication |
| Insulated panel system | Heated shops in cold climates | Any frame type | Higher cladding cost, lower labour | Higher upfront cost vs. batt insulation |
The symmetrical gable clear-span is the right starting point for most Canadian buyers planning a steel building as workshop space, because it balances steel efficiency with layout flexibility. Multi-span becomes competitive once the required width exceeds roughly 80 feet. Insulated panels are worth the premium in any province where the shop will be heated through winter, because the long-run energy savings and reduced condensation risk outweigh the upfront cost difference.
How to Choose the Right Workshop Configuration
Choose a symmetrical gable clear-span if your workshop is freestanding, you need full floor flexibility for vehicle bays or large equipment, and your required width is 80 feet or less. This is the most common choice for home shops, small commercial garages, and light fabrication operations.
Choose a single-slope frame if you are building against a property line, attaching to an existing structure on one side, or need predictable drainage to one side of the site. The slightly higher steel cost is offset by the site advantage.
Choose a multi-span frame if your required width exceeds 80 feet and you can plan your equipment layout around column lines from the start. Commercial fabrication shops and automotive service centres with many bays often fall into this category. The fabrication shops page covers large-span commercial workshop applications in more detail.
Choose a mezzanine-ready frame if you anticipate needing office space, a parts room, or elevated storage within five years. Specifying it now costs a fraction of what a retrofit engineering exercise costs later.
Choose insulated panels if your shop will be heated year-round and you are in a climate zone where condensation on the interior cladding is a real risk. Provinces like Manitoba, Saskatchewan, and northern Ontario are strong candidates. For a full breakdown of insulation and cladding choices by climate zone, the guide on steel building options for cold climates is worth reading before you finalise your spec.
Costs and Timelines
Steel building as workshop costs are driven by a specific set of inputs, not by square footage alone. The table below ranks the main cost drivers and explains what moves the number in each category.
| Cost Driver | Why It Matters | Approximate Impact |
|---|---|---|
| Span and eave height | Wider spans and taller eaves require heavier frame sections and more steel tonnage | High: the single largest variable in the kit price |
| Snow and wind load | Higher loads require heavier purlins, girts, and frame members; varies by municipality | High: can add 15-30% to frame weight in high-load zones |
| Door openings | Each large overhead door opening interrupts the frame and requires a header beam; wide bi-fold or hydraulic doors add further cost | Moderate to high depending on quantity and size |
| Insulation system | Batt insulation is lowest cost; insulated metal panels are highest; vapour barrier and liner panels sit in between | Moderate: can range from a small fraction to a significant share of total kit cost |
| Foundation | Concrete is a separate scope from the steel kit; anchor bolt placement must match the engineered drawings exactly | High: often the largest single surprise for first-time buyers |
| Permit and engineering | Stamped drawings are required in most Canadian municipalities; fees vary by jurisdiction | Low to moderate: predictable once the municipality is known |
| Steel commodity price | Hot-rolled steel prices move with global markets; quotes are time-bound for this reason | Variable: lock in pricing quickly after receiving a quote |
The two most common budget surprises are the foundation and the permit process. The steel kit price is what most buyers focus on, but the concrete foundation, anchor bolts, and site preparation are a separate contract that must be coordinated with the anchor bolt plan from the engineered drawings. Permit timelines also vary: some rural municipalities process applications in weeks, while urban centres can take several months. For a detailed look at what drives the overall price of a steel building in Canada, the metal building prices and cost guide covers each driver with realistic ranges.
Steel building quotes are time-bound because hot-rolled steel prices move with global markets. Once you receive a quote that fits your budget, moving to contract quickly protects you from commodity price movement during the fabrication window.
Risks and Common Mistakes
The most expensive mistake workshop buyers make is under-specifying door openings. A 10-foot-wide by 10-foot-tall overhead door is fine for a passenger vehicle but will not clear a pickup truck with a rack, a tractor, or a commercial van. Every large door opening interrupts the frame and requires a structural header, so adding a door after fabrication is a significant re-engineering exercise. Decide on door count, width, and height before the drawings are finalised.
The second common mistake is ignoring eave height. A 14-foot eave feels generous until you try to use a two-post hoist with a full-size truck on the lift. Most automotive workshops need a minimum 16-foot eave to clear a raised vehicle comfortably, and 18 feet is better if you plan to run overhead cranes or monorails. Eave height is cheap to add at the design stage and expensive to change later.
Condensation is a persistent problem in uninsulated or under-insulated steel workshops. Steel cladding conducts heat rapidly, and in a heated shop during a Canadian winter, warm interior air meeting cold cladding produces condensation that drips onto tools, vehicles, and electrical equipment. A proper vapour barrier, adequate insulation R-value for the climate zone, and ventilation designed to manage humidity are all part of a correctly specified workshop build.
Permit non-compliance is a risk that catches buyers who purchase a kit without verifying local requirements first. Some municipalities require a development permit before a building permit; others have setback rules that affect where on a lot a workshop can be placed. Starting the permit process early, with stamped drawings in hand, avoids the scenario where a delivered kit cannot be erected because the permit is still pending. The guide on steel building permits in Canada covers the CSA-A660 compliance process in detail.
How the Process Works
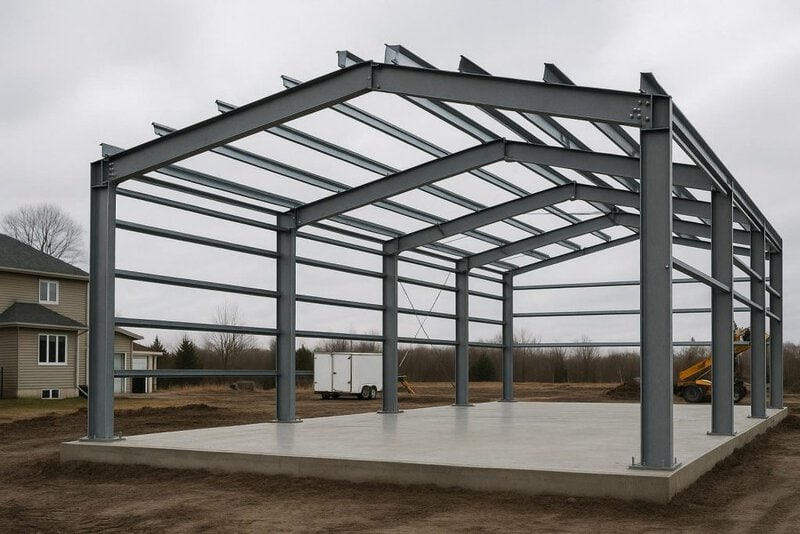
Using a steel building as workshop space follows a defined sequence that keeps the engineering, fabrication, and site work coordinated.
| Stage | What Happens | Buyer’s Role |
|---|---|---|
| 1. Requirements and site review | Span, eave height, door openings, intended use, municipality, and local snow and wind loads are captured | Provide site address, intended use, and any known constraints |
| 2. Stamped engineered drawings | A licensed engineer produces drawings to the National Building Code of Canada and the local load table; drawings are stamped for permit submission | Review and approve drawings; submit for permit |
| 3. Foundation and anchor bolt plan | The anchor bolt layout is extracted from the engineered drawings and provided to the concrete contractor | Engage a concrete contractor; ensure anchor bolts are placed to the plan before the pour sets |
| 4. Fabrication | Frame members, purlins, girts, cladding, and trim are fabricated to the approved drawings; lead times vary with plant load and steel availability | Confirm delivery address and site access; arrange erection crew or contractor |
| 5. Delivery and erection scheduling | Components are delivered to site on flatbed; erection follows the engineered assembly sequence | Ensure site is clear, level, and accessible for delivery trucks and a crane if required |
| 6. Enclosure and finishing | Cladding, insulation, doors, windows, and trim are installed; mechanical and electrical rough-in follows | Coordinate trades for mechanical, electrical, and any interior finishing |
| 7. Inspection and occupancy | Municipal inspector reviews the completed structure against the permit drawings | Schedule inspection; address any deficiencies before occupancy |
The critical path item is almost always the foundation. The concrete must cure to the specified strength before the steel frame is erected, and the anchor bolts must be in exactly the right position. A misplaced anchor bolt can delay erection by days while a repair plan is engineered. Ordering the steel kit and engaging the concrete contractor at the same time, rather than sequentially, keeps the schedule tight.
Buildings are engineered to the National Building Code of Canada and the local snow-load table. This is why an Alberta and an Ontario building of the same size are not the same building. Always confirm the municipality before requesting a quote.
The National Building Code of Canada sets the baseline structural requirements that all stamped drawings must satisfy, and provincial amendments layer on top of that baseline depending on where the building is located.
Frequently Asked Questions
What size steel building do I need for a home workshop?
A 30×40 building gives you roughly 1,200 square feet, which is enough for two vehicle bays and a workbench area. A 40×60 at 2,400 square feet is a comfortable three-bay shop with room for a parts storage area. Eave height matters as much as footprint: 14 feet is the practical minimum for most automotive work, and 16 to 18 feet is better if you plan to use a hoist or overhead storage.
Do I need a permit to build a steel workshop in Canada?
In almost every Canadian municipality, yes. Buildings above a certain floor area threshold, which varies by province and municipality, require a building permit and stamped engineered drawings. Some rural areas have higher thresholds, but relying on an exemption without confirming it with the local authority is a risk. Starting the permit process before ordering the steel kit avoids delays on site.
How long does it take to get a steel workshop built?
From signed contract to occupancy, a typical workshop project runs four to eight months. Permit approval timelines vary the most: rural municipalities can approve in two to four weeks, while urban centres may take three to six months. Fabrication lead times depend on plant load and steel availability. Foundation work and erection together typically take two to six weeks depending on building size and weather.
What is the best insulation for a heated steel workshop in Canada?
For a heated shop in a cold climate, the priority is controlling condensation as much as achieving a target R-value. A vapour barrier installed on the warm side of the insulation is essential. Batt insulation between the girts and an interior liner panel is the most common approach. Insulated metal panels eliminate the thermal bridging at girts and produce a tighter envelope, making them the better choice in very cold climates like the Prairies or northern Ontario.
Can I add a mezzanine to my steel workshop later?
You can, but it is significantly cheaper and faster to specify the mezzanine at the design stage. A mezzanine added after fabrication requires a full re-engineering exercise to verify that the existing frame can carry the additional load, and in many cases the frame must be reinforced. If there is any chance you will want a mezzanine within the building’s life, include it in the original design.
What door size should I specify for a vehicle workshop?
For a standard pickup truck or SUV, a 12-foot-wide by 12-foot-tall overhead door is the practical minimum. For commercial vans, cube trucks, or equipment with attachments, 14 feet wide by 14 feet tall is safer. Hydraulic bi-fold doors are common in aviation and large equipment workshops because they open fully without the vertical clearance requirement of a sectional door. Specify every door opening before the drawings are finalised, because changes after fabrication are expensive.
How does snow load affect my steel building as workshop cost?
Snow load is one of the largest variables in the frame design. A municipality with a high ground snow load requires heavier purlins, girts, and frame sections to carry the accumulated snow weight safely. In high-load zones, the frame steel weight can be 15 to 30 percent greater than an equivalent building in a low-load zone. This is why the site address is one of the first things Titan captures in the requirements review.
Is a pre-engineered steel workshop better than a wood-frame shop?
For most Canadian workshop applications, steel offers a longer service life, lower maintenance, better fire resistance, and no risk of rot or pest damage. Wood-frame construction can be faster to permit in some rural jurisdictions and may have a lower upfront cost at small spans. Steel becomes clearly more economical at spans above 30 feet, where clear-span wood framing becomes expensive and complex. Insurance premiums for steel buildings are also typically lower than for wood-frame structures of equivalent size.
What foundation does a steel workshop need?
Most steel workshop buildings in Canada use a concrete perimeter foundation with anchor bolts cast into the footing at positions specified in the engineered drawings. Slab-on-grade is common for smaller shops. The foundation design depends on the building loads, the local frost depth, and the soil bearing capacity at the site. The foundation is a separate concrete scope from the steel kit and must be completed and cured before erection begins.
If you are ready to move from planning to a real quote, the team at Titan Steel Buildings can review your site, span, and load requirements and produce a time-bound price with stamped engineering included. Request a quote to get the process started.